Showing posts with label how. Show all posts
Showing posts with label how. Show all posts
Monday, February 17, 2014
How to Install a Printer
Printers have become a must household item that many computer companies have packaged computers with inexpensive printers. However, despite the fact these printers were being shipped with a specific computer, these printers can be installed on any other computer as well. Theore, knowing how to install a printer is important. While it is straight forward, it can be confusing on how to configure it to the specific computer.
How to Install a Printer
Find a suitable place for the printer and set it up there so that the cables can reach the computer as well as an electrical outlet. Because printing has become increasingly precise, it is important to keep the printer flat. Once it is set up and it has been plugged in, turn the computer on. When it loads, the computer will prompt you to recognize and install the software that goes along with the hardware.
Put the installation CD into the computer and let it load. If you dont have the CD, typically you can find the drivers on the companys website. When the installation software opens, set up the installation and put it into a folder where youll remember where it is. Install the software and then allow it to run through. Once it has installed, restart the computer to ensure that all the components get added properly.how to Install a Printer
Now that the computer has been added, its time to make it the default printer. Open the control panel and double click on the printers tab. This will open up and share a list of all the current printers that you have on this computer. Pick the one that you just installed and open the details. It will ask whether or not you want this to be the default printer. Press the yes button and then hit apply before closing this tab down.
Finally, open a word document and do a test print. If it is the first time the printer is being used, itll print an elaborate scheme of colors and text to make sure everything is working. Then, print something for yourself to finalize whether it works or not. If all looks good, the printer will have been successfully installed and can theore be used whenever it is needed.
Read more...
How to Install a Printer
Find a suitable place for the printer and set it up there so that the cables can reach the computer as well as an electrical outlet. Because printing has become increasingly precise, it is important to keep the printer flat. Once it is set up and it has been plugged in, turn the computer on. When it loads, the computer will prompt you to recognize and install the software that goes along with the hardware.
Put the installation CD into the computer and let it load. If you dont have the CD, typically you can find the drivers on the companys website. When the installation software opens, set up the installation and put it into a folder where youll remember where it is. Install the software and then allow it to run through. Once it has installed, restart the computer to ensure that all the components get added properly.how to Install a Printer
Now that the computer has been added, its time to make it the default printer. Open the control panel and double click on the printers tab. This will open up and share a list of all the current printers that you have on this computer. Pick the one that you just installed and open the details. It will ask whether or not you want this to be the default printer. Press the yes button and then hit apply before closing this tab down.
Finally, open a word document and do a test print. If it is the first time the printer is being used, itll print an elaborate scheme of colors and text to make sure everything is working. Then, print something for yourself to finalize whether it works or not. If all looks good, the printer will have been successfully installed and can theore be used whenever it is needed.

Saturday, November 30, 2013
How to Reset Epson Stylus 860

To perform the reset tiens what to do is the following:
Hay que presionar y mantener apretado el boton de LOAD/EJECT (tomar hoja) y el de Cleaning (limpieza) . We must press and hold the button LOAD / EJECT (take up) and the Cleaning (cleaning).
Mientras mantienes apretados esos botones , tienes que presionar el boton de POWER (encendido) y tenerlo apretado hasta que las luces (ink out – tinta vacia y paper out- falta papel) empiezan a titilar o parpadear. While holding these buttons, you must press the power button (on) and keep it tight until the lights (ink out - empty ink and paper out-out of paper) start to flash or flicker.
Cuadno suceda esto suelta todos los botones. When it has to happen this release all buttons.
Cuando pasen 3 o 4 segundos apreta y mantenlo apretado el boton de CLEANING (limpieza) hasta que las luces que titilaban dejen de hacerlo. When you spend three or four seconds click and hold down the button CLEANING (cleaning) until the lights flickered stop.
YA ESTA!!! NOW THIS! ya quedo lista para usarla!! and am ready to use!
Seria conveniente que cada vez que se haga este procedimiento hacer una limpieza a la esponja interna de la impresora, por que alli deja depositado todo el exceso de tinta de la impresora y podria derramarse. It would be desirable that each time you do this procedure done to clean the sponge inside the printer, because there left on deposit all excess ink from the printer and may spill. Esto no es 100 % necesario pero seria muy bueno que lo hagas. This is not 100% necessary but it would be very good to do so.
Hay que presionar y mantener apretado el boton de LOAD/EJECT (tomar hoja) y el de Cleaning (limpieza) . We must press and hold the button LOAD / EJECT (take up) and the Cleaning (cleaning).
Mientras mantienes apretados esos botones , tienes que presionar el boton de POWER (encendido) y tenerlo apretado hasta que las luces (ink out – tinta vacia y paper out- falta papel) empiezan a titilar o parpadear. While holding these buttons, you must press the power button (on) and keep it tight until the lights (ink out - empty ink and paper out-out of paper) start to flash or flicker.
Cuadno suceda esto suelta todos los botones. When it has to happen this release all buttons.
Cuando pasen 3 o 4 segundos apreta y mantenlo apretado el boton de CLEANING (limpieza) hasta que las luces que titilaban dejen de hacerlo. When you spend three or four seconds click and hold down the button CLEANING (cleaning) until the lights flickered stop.
YA ESTA!!! NOW THIS! ya quedo lista para usarla!! and am ready to use!
Seria conveniente que cada vez que se haga este procedimiento hacer una limpieza a la esponja interna de la impresora, por que alli deja depositado todo el exceso de tinta de la impresora y podria derramarse. It would be desirable that each time you do this procedure done to clean the sponge inside the printer, because there left on deposit all excess ink from the printer and may spill. Esto no es 100 % necesario pero seria muy bueno que lo hagas. This is not 100% necessary but it would be very good to do so.
Tuesday, November 26, 2013
How to reset the protection counter of Epson Stylus R7880
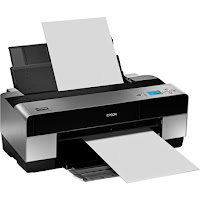
Epson Stylus Pro R7880 Adjustment Program
FIX PRINTER ERROR "parts inside printer end service life, waste ink pad counter overflow error"
Please follow the steps below to reset the protection counter effectively.
- Double click AdjProg.exe.
- Click “Accept” button.
- Click "Select" button. and select your printer model then click "OK"
- Click “Particular adjustment mode” button.
- Select on “Waste ink pad counter” and click “OK” button.
- Click on “Initialization” button and the program will reset the protection counter.
- Turn off the printer as a program instructed then turn on again.
- Click “Finish” button. and its done!
Warning: You might end up with ink leaking out of the printer if you dont either replace the waste ink pad or install external waste bin.
Saturday, November 23, 2013
HOW TO RESET CANON PRINTER PIXMA IP1980

Canon PIXMA iP1980 Photo Printer is same as Canon Pixma ip 1880,
TO FIX PRINTER ERROR "parts inside printer end service life, waste ink pad counter overflow error, waste ink absorber full error you should use General resetter Tools for Canon Pixma ip 1880.
How you can reset ink level on Canon Pixma iP1800
Step1. Press and hold the power button while plugging in the powerchord - green lamp will glow.
Step2. Hold the power button and press the resume button twice - the orange lamp will blink and return to green.
Step3. Release the power button - the prnter will be ready.
Step4. Print a test page.
Step5. Printer is Ok Now.
You Can Use General Tool Also To Reset iP1980.
Download General Tool
Tuesday, November 19, 2013
How to Reset Waste Ink Tank Canon MP390 and Canon MP360
 Canon MultiPass MP390 Multifunction Review
The Canon MP390 is a great multifunction printer for small homes. For most homes and small businesses, space is a consideration when buying office machines, which is exactly why multifunctions like the MultiPass MP390 from Canon are such a popular choice. By combining printing, copying, scanning, and fax functions into one convenient unit, you can save on valuable desktop space, while taking advantage of all the functionality normally provided by four separate peripherals. The MP390 can also print high-quality color photos directly from compatible cameras and memory cards.
Canon MultiPASS MP360 is All-in-One (Printer - Copier - Scanner) multifunction Inkjet printer, designed for home and small office.
Manual Reset procedure Waste Ink Tank for Canon MP390 and Canon MP360 Just Follow this step to reset waste ink tank full:
- Start with printer on, press aadditional functions, Scan, Copy, Scan. Now you should be in service mode.
- Select Test mode which is like the last available selection
- Select #8 Printer Test, it will do something here like cleaning or something then it will come up with some other option this is where it gets a bit confusing cause now all it says is like 8-2 or 8-3 push the + or - button until it says 8-3 then hit the select button
- The menu will now say EEPRsaya Clear
- Select Ink count which is option (0) and press set
- Then press Reset Followed by the power button and then wait for it to restart.
Thursday, November 14, 2013
How To fix error code C0840001 on HP printers

How To fix error code C0840001 on HP printers
The error code C0840001 appears on HP printers like D1660, F2180... Sometimes, you can ear a grinding noise.
Procedure 1:
Turn printer off.
Open the door.
With a flashlite, look inside to the right side where is a small tray that slides forward and backwards.
Push the tray forward until it stops then move it backwards until the little black tab on the right is 1/2 inch from the metal part of the carriage.
Close the door.
Turn printer on.
Procedure 2:
Look for a spring and lever arm with some small gears. It is located to the left of the printer, near the guide rail.
Put a couple of drops of oil on the gears and lever pivot shaft.
Saturday, October 19, 2013
How to Print Screen in Apple
Apple is not a topic that has to give the introduction of itself and especially after the death of Steve Jobs (1955-2011) who was the inventor of this superb product. He makes the computer in reach of a common man. Apple has now become the top most and leading company of cyber world giving motivation to other companies who are seeking towards this business. Apple has got the easiest process of doing work with I-phones. One of their functions is going to be discussed downwards.
Print screen is the function of computer that helps remembering the task when you do the two different works at a same time. So, now I am going to tell you that how to print screen in Apple the process includes some steps that has to be followed.
A. Firstly you would have to go to the option of GRAB which will be located at the bottom of your I-phone
B. After clicking on grab you will see many options choose CAPTURE out of them.
C. After it an option will highlight named SCREEN when you click on it the next option automatically comes and that is SCREEN GRAB.
D. Now you have to do nothing just click on that option and an untitled image will appear at your screen. If you want to save that just click on save option and it will be saved wherever you wants.
As we are aware that apple has shortcuts for its every function likewise the print screen has also got a shortcut.
COMMAND-SHIFT-3 is used to select the entire screen but if you want some selected screen to be printed then you have to go with COMMAND-SHIFT-4.
So, as we read that the process of How to Print Screen in Apple is quite easy and simple we just have to follow some simple steps otherwise shortcuts are always there to help us.
Thursday, October 10, 2013
How to reset Canon MX318 printer Ink absorber is full Error Code 27 5B00

If you encounter a problem or an error like "Ink absorber is full" or Error Code 27 or "Error Code 5B00". Its mean that the Printer Counter Protection is Full and it required a reset and Ink wastepad replacement, if you want your printer to work again. There are two ways to reset the Canon MP (all in one) printer, One is by using a Software tool and the other is manually resetting the EEPROM of the printer. Below is the step by step procedure on how to reset your Canon MP (All in One) printer.
Please follow the step by step procedure to reset your Canon Pixma MX318 Printer
- Turn off the Printers.
- Press and Hold the "Stop/Reset" button then press POWER button.
- Release the "Stop/Reset" button while keeping POWER button on press.
- Press "Stop/Reset" 2 times and then release all the buttons.
- Note: If the above was properly performed the printer will enter the "Service Mode".
- Press the "Stop/Reset" button 4 times, this will select the clear waste ink counter function. The lamp will alternate (change) color with each key press.
Mode:
1. Service/Factory test printout, including ink sensor check.
2. EEPROM - Info printout.
3. EEPROM - Initialization.
4. Reset the Waste ink counter. - After selecting the desired mode (eg 4), press the POWER button to "set" the change, and return to the top of the function selection menu. Press the POWER button again to restart the printer. Or unplug the printer to turn off.
- On the Canon Pixma MX318 Printers, And your done!
Warning: Getting rid of the error message won’t change that you might end up with ink leaking out of the printer if you don’t either replace or clean the ink wastepad.
Sunday, October 6, 2013
How to Reset Waste Ink Counter Canon Pixma iX5000 and iX4000
To reset counter Canon PIXMA iX4000 or iX5000 you have to enter to service mode. Procedure to enter to service mode on Canon PIXMA iX4000 or iX5000 is as following :
Read more...
- Connect the Canon PIXMA iX5000 or iX4000 printer to the power cord. ( note : If the automatic power-on function is enabled in the printer, the printer enters the service mode for the first time, but it will never enter the service mode if the printer is turned off by the Power button. This is because the printer remains to be turned on internally if the power is turned off by the Power button. To prevent this, disconnection of the power cord is required before starting the printer in the service mode ) .
- With the Canon PIXMA iX5000 or iX4000 printer powered off, while pressing the Resume/Cancel button, press and hold the Power button. (note : Don’t release the buttons. The Power LED lights in green to indicate that a function is selectable.)
- While holding the Power button, release Resume/Cancel button. (Don’t release the Power button.)
- While holding the Power button, press Resume/Cancel button 2 times, and then release both the Power and Resume/Cancel buttons.
- When the Power LED lights in green, press the Resume/Cancel button 4 times to reset waste ink counter in the Canon Pixma iX5000 / iX4000. (note : If the Power LED does not light in green the printer does not enter the service mode, disconnect the power cord and plug it again. Then start from step 1 to start the printer in the service mode again).
- At the end of the service mode, press the Power button. The paper lifting plate of the sheet feed unit will be raised.
- Each time the Resume/Cancel button is pressed, the Alarm and Power LEDs light alternately, Alarm in orange and Power in green, starting with Alarm LED.
Monday, September 23, 2013
How to reset the protection counter of Epson L100 printer

FIX PRINTER ERROR "parts inside printer end service life, waste ink pad counter overflow error"
Please follow the steps below to reset the protection counter effectively.
- Double click Adjprog.exe.
- Click “Accept” button.
- Click "Select" button. and choose your printer model then click "OK"
- Click “Particular adjustment mode” button.
- Select on “Waste ink pad counter” and click “OK” button.
- Check on Main pad counter and click on “Initialization” button and the program will reset the protection counter.
- Turn off the printer as a program instructed then turn on again.
- Click “Finish” button. and its done!
Adjprog.exe
Subscribe to:
Posts (Atom)