Saturday, September 28, 2013
Xerox Phaser 3010 Printer
If you have bought new Xerox phaser 3010 model printer and you want to
print several pages, you might be well aware of absence of Duplex
printing option on this printer. And if you want duplex manually on your
macbook which doesn't even show Duplex option even in inactive mode,
then these steps can make your life little easy:
i) Print in multiples of 10 or 20 to make life easy.
ii) Now to print first 20 pages (numbered) of your original document,
you need only 10 sheets as you are going to print on both sides i.e.
duplex printing manually.
iii) Though you need only 10 sheets to print 20 pages, don't count
exactly 10 sheets and load into the tray but randomly pick thicker chunk
with more than 10 sheets. Don't worry about how many sheets have been
picked, but you must pick handful of sheets more than 10 (will explain
the reason for more than 10).
iv) Load this chunk onto the tray of printer and set the printer as
usual. Then go to your original document, click 'Print' option. You will
get a template if it is a Acrobat file similar to the one show below:
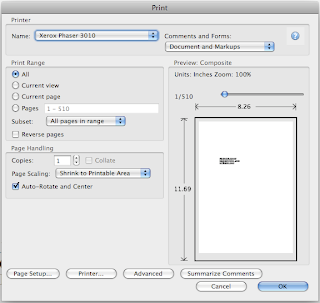
you can see i'm trying to print a document which has 510 pages using manual duplex option on Xerox phaser 3010.
v) But when you want to print in multiples of 20 pages of original, i
said we need only 10 sheets and i had asked to load quite a chunk of
sheets to print these first 20 pages. If you want to print only 20
sheets, then template would like below:
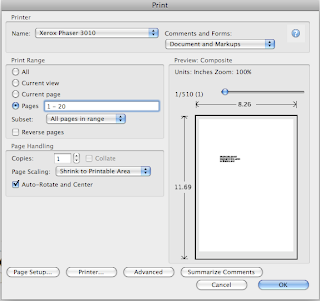
you can see pages 1 - 20 in this template.
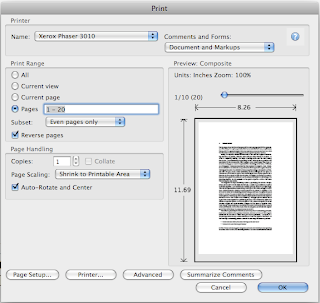
vi) Once you get this go to the next option 'Sub set' below that. Here
choose 'Even pages only' option. And then select 'Reverse pages' option
too. Now the template looks like this:
vii) Now click 'ok'. Once you click ok, it will print pages 20, 18,
16......2 thats it. Wait till it prints 2 i.e. completes its task of
printing all even numbered pages between 1 - 20 in reverse order. After
this, now discard all other blank sheets from the tray since I had asked
you to pick a larger chunk greater than 10 sheets. Now those 10 printed
sheets are at the top. Don't touch and disturb the order. Follow the
next few steps carefully, which are important and will reduce your work
to great extent.
viii) Now the those printed sheets are actually in a manner in which the
page no. 2 is at the top but with a blank sheet facing you while page 2
is face down. Which means page no. 1 will be printed on this page. Now,
you pick those 10 sheets and load them onto tray but while doing so
rotate the sheets 180 degrees as that is the feeding position. Once you
load, again click 'Print' option. After clicking print operation, next
follow the same procedure i.e.
- go to pages 1 - 20; go to subset, now opt 'Odd pages only' option; and
then undo the Reverse pages option. It will look like the template
shown below:
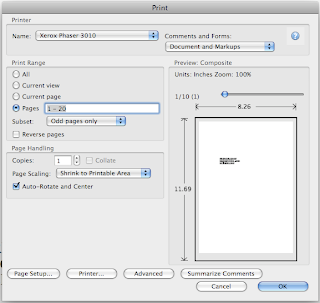
Now click ok.
ix) Now odd page nos. 1, 3 ....19 will be printed on the back side of those even numbered pages.
x) Now get the rhythm right. Next go for pages 21 - 40 and so on...
Now why i asked you initially to pick a chunk of sheets instead of
exactly 10 is that there is every bit a chance of you picking only 9
sheets and giving command to print 1-20 which causes error and
everything will be printed wrongly. So, when you pick a chunk, you can
avoid this error. I committed this error and wasted 10 sheets.
Friday, September 27, 2013
Epson Picture mate General Error
You will need a small screwdriver and small flashlight.
1.On rear
of the printer, you will see a small “U” shaped plug or cap, located on
the opposite side of the printer as the power cord. Pry this cover off.
2.
With a small flashlight (preferably one that you can hold in your mouth
in order to aim it and see so you can have free hands.) You will see a
small spindle with that has a brown colored belt around it. This is the
belt that carries the carriage (head) back and forth.
3. Just in
front of this spindle you will see the backside of the head assembly
(probably rectangular in shape). It is black plastic with a few notches
on the edge. Take a screwdriver and try and "gently" pry left and then
right kind of rocking the assembly back and forth (left and right). You
won't be able to actually move it much, the idea here is to just jiggle
it loose.)
4. After you wiggle this assembly a little, remove the screwdriver.
5.
Power on the printer and watch the assembly to see if it moves. If you
were successful you will see it move some to the right then the printer
will go thru some maneuvers and you will get a menu that will allow you
to print, and not the error.
If the printer has set for a while,
the heads may take several cleanings or you may need a new cartridge.
But hopefully, you will no longer have the General Error code.
Read more...
1.On rear
of the printer, you will see a small “U” shaped plug or cap, located on
the opposite side of the printer as the power cord. Pry this cover off.
2.
With a small flashlight (preferably one that you can hold in your mouth
in order to aim it and see so you can have free hands.) You will see a
small spindle with that has a brown colored belt around it. This is the
belt that carries the carriage (head) back and forth.
3. Just in
front of this spindle you will see the backside of the head assembly
(probably rectangular in shape). It is black plastic with a few notches
on the edge. Take a screwdriver and try and "gently" pry left and then
right kind of rocking the assembly back and forth (left and right). You
won't be able to actually move it much, the idea here is to just jiggle
it loose.)
4. After you wiggle this assembly a little, remove the screwdriver.
5.
Power on the printer and watch the assembly to see if it moves. If you
were successful you will see it move some to the right then the printer
will go thru some maneuvers and you will get a menu that will allow you
to print, and not the error.
If the printer has set for a while,
the heads may take several cleanings or you may need a new cartridge.
But hopefully, you will no longer have the General Error code.
Thursday, September 26, 2013
Resetter Code for Canon BJ F900

1. Turn off the printer.
2. Press and hold the RESUME button, then press and hold the POWER button.
3. Release the RESUME button, then press and release the RESUME button two more times in succession. (youre still holding the POWER button during this). The printer mechanics will move momentarily.
4. You are now in Service mode.
5. Pressing the RESUME key will select a function; for example, pressing RESUME 4 times will select the clear waste ink counter function. The lamp will alternate color with each key press.
(a). service/factory test printout, including ink sensor check
(b). EEPROM info printout
(c). EEPROM initialization
(d). Clear the waste-ink counter
(e). Printer model setting. (more selections beyond this- leave this alone)
6. After selecting mode, press the POWER button to commit the change, and return to the top of the function selection menu. Pressing the POWER button again turns off the printer for a resta
The Secret Resetter Code for Canon BJ-30 BJC-35v BJC-70
F14 Error Reset
1. Unplug adapter
2. Hold POWER
3. Plug in ADAPTER
4. Release POWER after printer starts
5. Hold FF and MENU and press POWER
6. Release after beeps
7. Press <> Cartridge until 1A is displayed
8. Press ONLINE
9. Press POWER to shutoff printer
10. Unplug printer then re-plug printer
Subscribe to:
Posts (Atom)